


There must be a priority given to safety when you are working on the vehicle. Must park the car on a level surface, engage the parking brake, and use safety goggles and gloves during the process to protect yourself from potential hazards
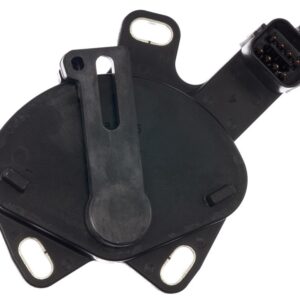
Disconnect the electrical connector connected to the speed sensor carefully. Try to avoid the wires damaging or the sensor itself. Check carefully that there is no sign of corrosion or visible damage.
During the sensor testing also check the wiring that is leading to it. Find if there is any sign of damage, fraying, wear, or exposed conductors. If you check if there is any issue with the wiring there is a need to be replaced or repaired to ensure the accurate function of the sensor
If the vehicle is showing a check engine light due to a faulty speed sensor, there can be an OBD-II scanner used to clear the error codes after finishing the test. This step is important for resetting the vehicle’s computer system and making sure proper monitoring.
When you are done testing the sensor and addressing any wiring problems, reconnect the electrical connector to the speed sensor. Check that it is properly fastened to avoid any future issues.
Using the jack carefully remove the car from the jack support. Before continuing, ensure that the car is properly parked and is steady.
At last, take your vehicle for a test drive to check its performance. Check the behaviour of transmission like shifting smoothness and absence of warning lights. An accurate functioning sensor must result in improved transmission performance.
Only 5 left in stock (can be backordered)
$29,137.67
There must be a priority given to safety when you are working on the vehicle. Must park the car on a level surface, engage the parking brake, and use safety goggles and gloves during the process to protect yourself from potential hazards
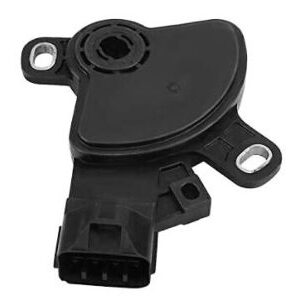
Disconnect the electrical connector connected to the speed sensor carefully. Try to avoid the wires damaging or the sensor itself. Check carefully that there is no sign of corrosion or visible damage.
During the sensor testing also check the wiring that is leading to it. Find if there is any sign of damage, fraying, wear, or exposed conductors. If you check if there is any issue with the wiring there is a need to be replaced or repaired to ensure the accurate function of the sensor
If the vehicle is showing a check engine light due to a faulty speed sensor, there can be an OBD-II scanner used to clear the error codes after finishing the test. This step is important for resetting the vehicle’s computer system and making sure proper monitoring.
When you are done testing the sensor and addressing any wiring problems, reconnect the electrical connector to the speed sensor. Check that it is properly fastened to avoid any future issues.
Using the jack carefully remove the car from the jack support. Before continuing, ensure that the car is properly parked and is steady.
At last, take your vehicle for a test drive to check its performance. Check the behaviour of transmission like shifting smoothness and absence of warning lights. An accurate functioning sensor must result in improved transmission performance.
| Warehouse | Inventory at warehouse 2 |
|---|

Get E-mail updates about our latest products and special offers.
Sensors and More is Jamaica’s ultimate online auto parts store. Established in 2020, we specialize in genuine electrical parts for Japanese, Read more…
Reviews
There are no reviews yet.