

The most common symptom of a bad knock sensor is a check engine light on your dashboard. It can also result in a knocking or detonating engine in the worst case, but most often you will notice signs like loss of engine power and high fuel consumption. To diagnose a bad knock sensor, you will need a scan tool or a code reader to read the trouble codes stored in the ECU. The codes related to the knock sensor are usually P0325 or P0332. However, these codes do not necessarily mean that the knock sensor itself is faulty, as they could also indicate other problems, such as wiring issues or engine knock.
To confirm that the knock sensor is the culprit, you will need to test it with a multimeter. Here are the steps to do that:
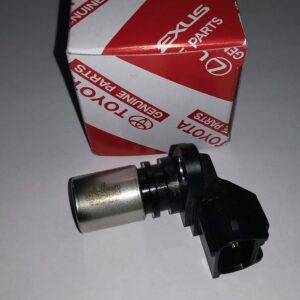
If you have confirmed that your knock sensor is bad, you will need to replace it with a new one. The replacement procedure may vary depending on your vehicle model and engine type, but here are some general steps you can follow:
Some tips and precautions for replacing a knock sensor are:
$13,812.00
The most common symptom of a bad knock sensor is a check engine light on your dashboard. It can also result in a knocking or detonating engine in the worst case, but most often you will notice signs like loss of engine power and high fuel consumption. To diagnose a bad knock sensor, you will need a scan tool or a code reader to read the trouble codes stored in the ECU. The codes related to the knock sensor are usually P0325 or P0332. However, these codes do not necessarily mean that the knock sensor itself is faulty, as they could also indicate other problems, such as wiring issues or engine knock.
To confirm that the knock sensor is the culprit, you will need to test it with a multimeter. Here are the steps to do that:
If you have confirmed that your knock sensor is bad, you will need to replace it with a new one. The replacement procedure may vary depending on your vehicle model and engine type, but here are some general steps you can follow:
Some tips and precautions for replacing a knock sensor are:
| Compatible with | INFINITY- VQ35DE, VQ30DE, VK45DE, |
|---|
Get E-mail updates about our latest products and special offers.
Sensors and More is Jamaica’s ultimate online auto parts store. Established in 2020, we specialize in genuine electrical parts for Japanese, Read more…
Reviews
There are no reviews yet.